GINERNET
GINERNET is a paid sponsor of Termix. This page was created as part of that sponsorship.
Benefits
Running the Termix server on a cloud VPS instead of inside your own network has a few advantages:
- Out-of-band access: If Termix runs inside the network it manages, an outage takes Termix with it, and your hosts, credentials, and saved sessions are stuck inside the system you are trying to fix. An external VPS stays reachable no matter what happens to your network.
- Independent failure: A VPS does not share power, network, hypervisor, or storage with the machines it manages. One failure cannot take out both your infrastructure and the tool you fix it with.
- Reachable from anywhere: A public endpoint means no VPN or port forward to reach your hosts from a laptop, a phone, or someone else's network.
- Static IP: A fixed address is easy to allowlist in firewalls and
sshdconfigs, and it does not change when a home ISP re-leases your address. - No hardware to maintain: Backups and rebuilds are handled by GINERNET.
- Better uptime: Datacenter power, cooling, and network redundancy usually beat a homelab or office rack.
Setup
Create an account
Go to manager.ginernet.com and create an account with a username and password.
Once you are in, open the billing tab and fill in your billing details. You will also need to complete identity verification before you can create a server.
Add an SSH key
Open the SSH Keys tab in the left sidebar and click Generate SSH key, or Add SSH key if you already have one.
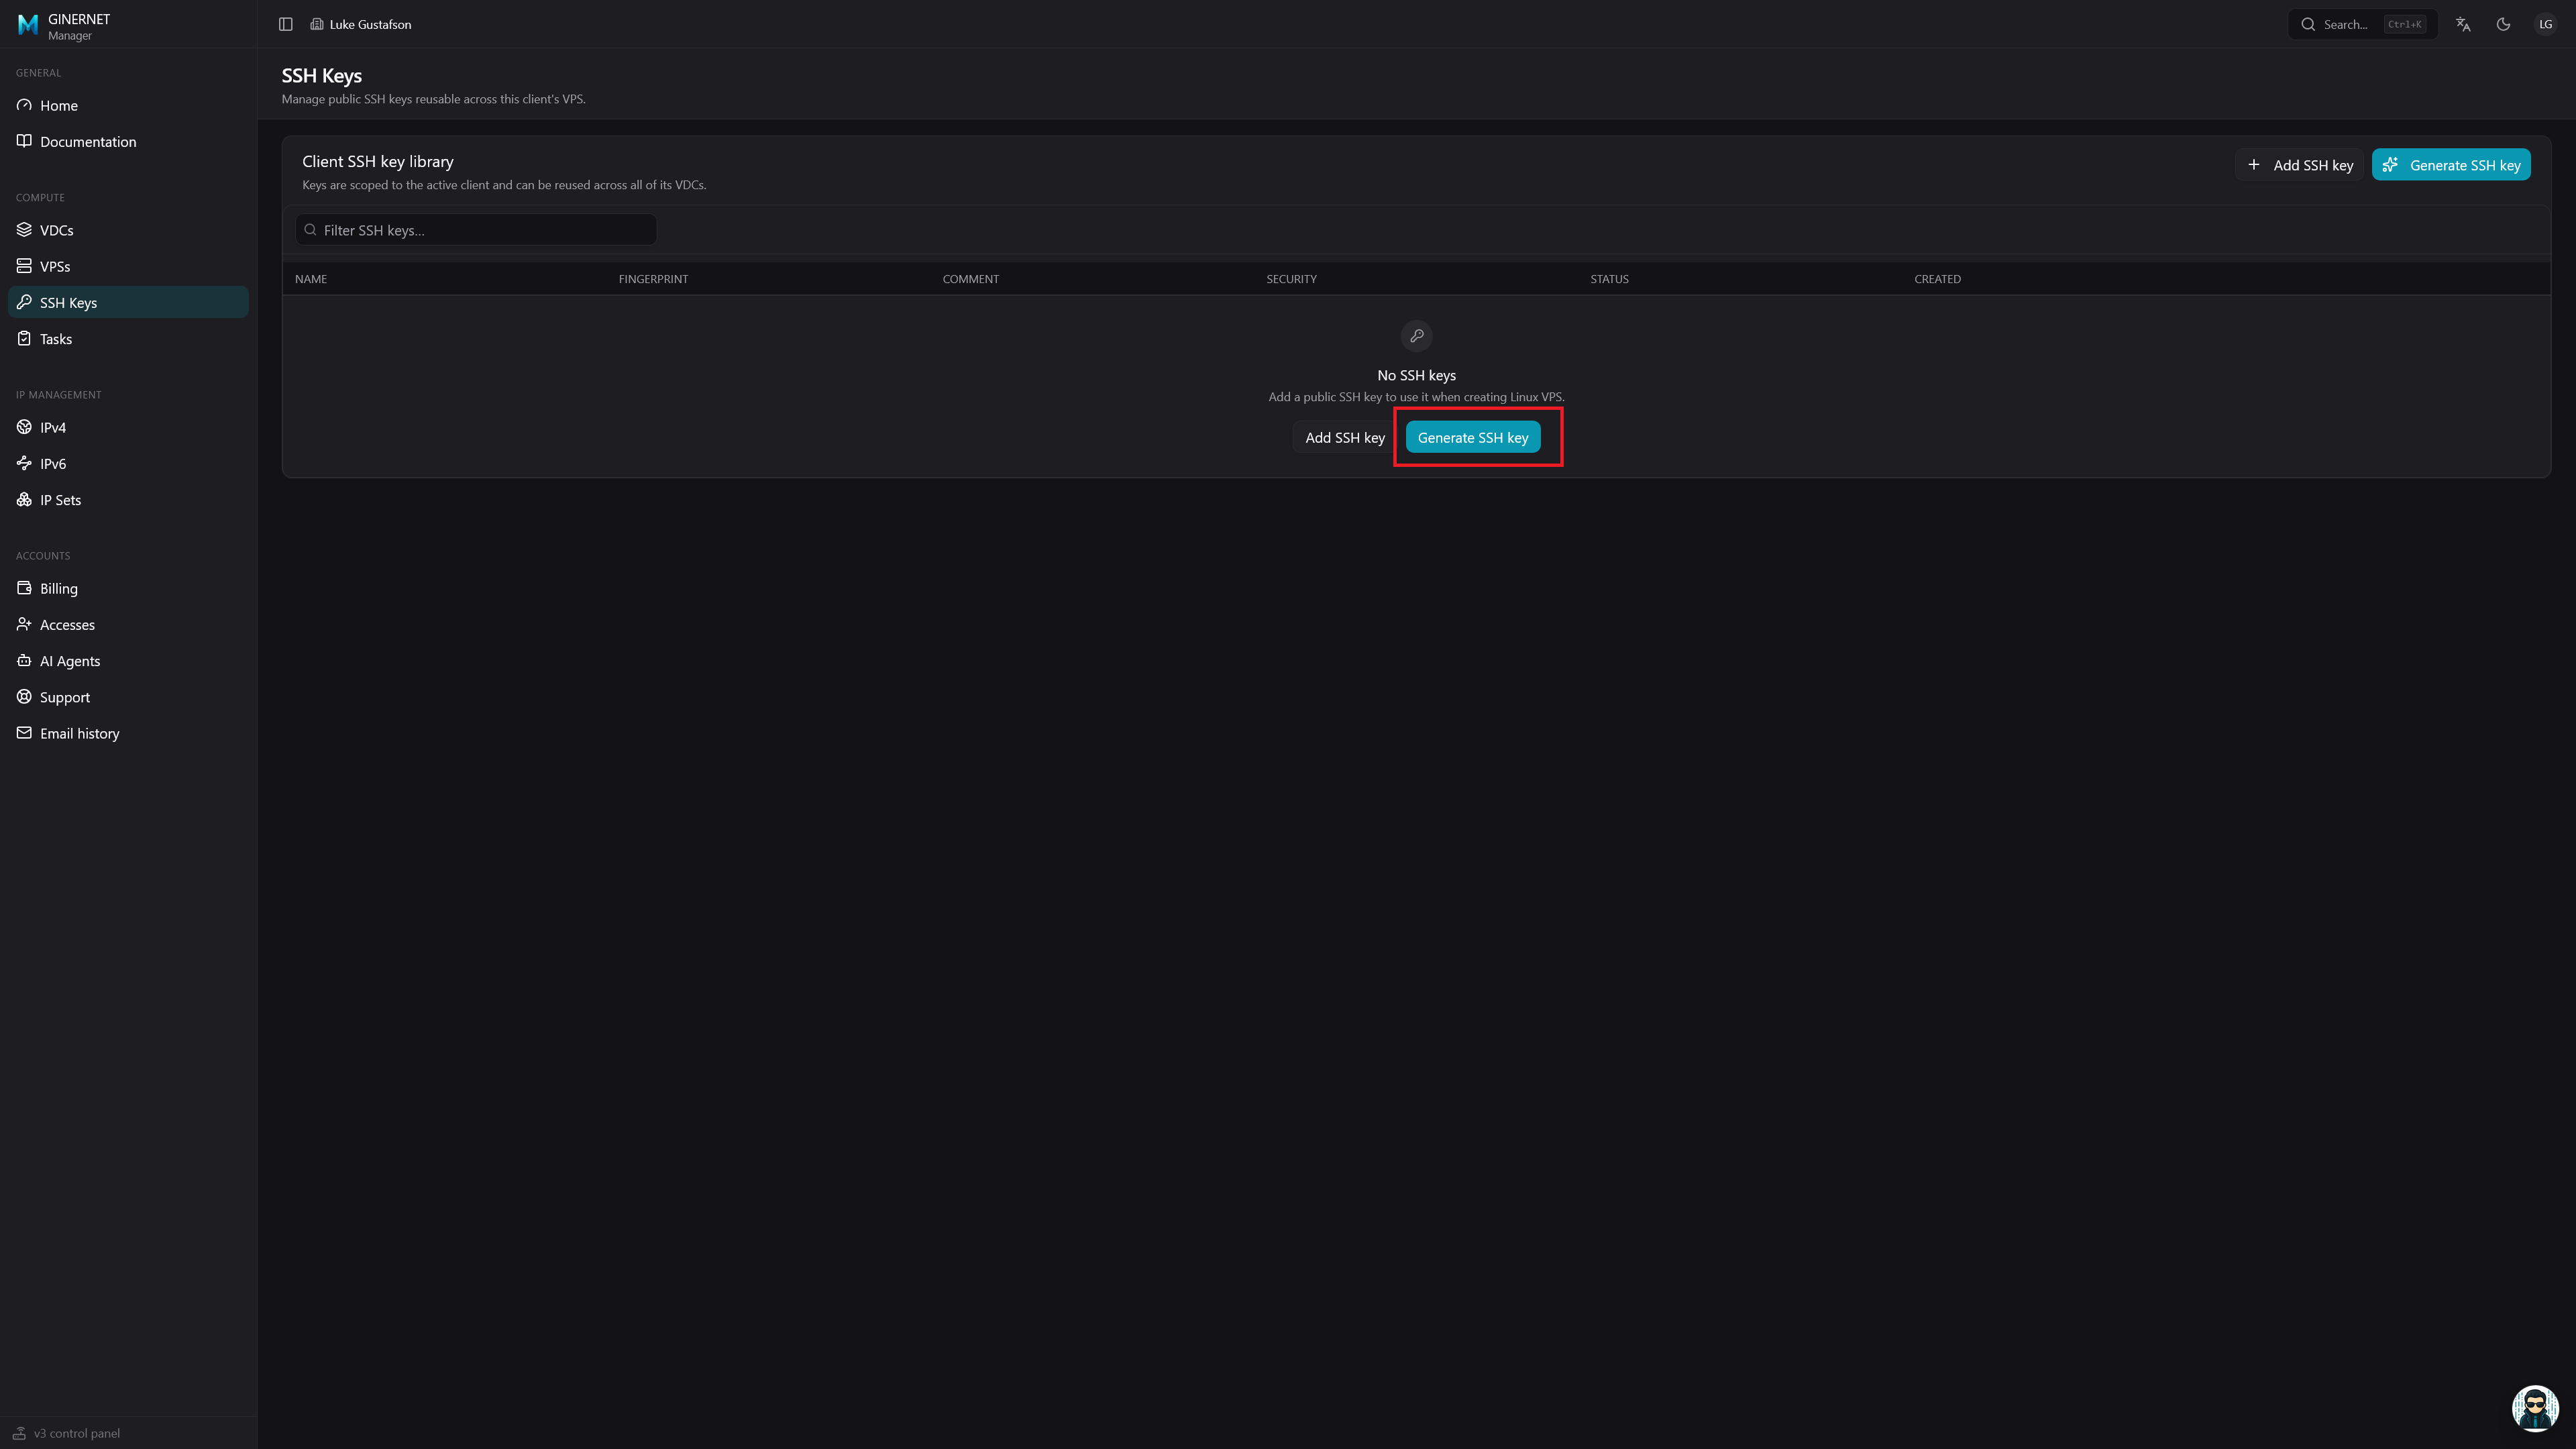
Name it something like Termix SSH Key and click Generate.
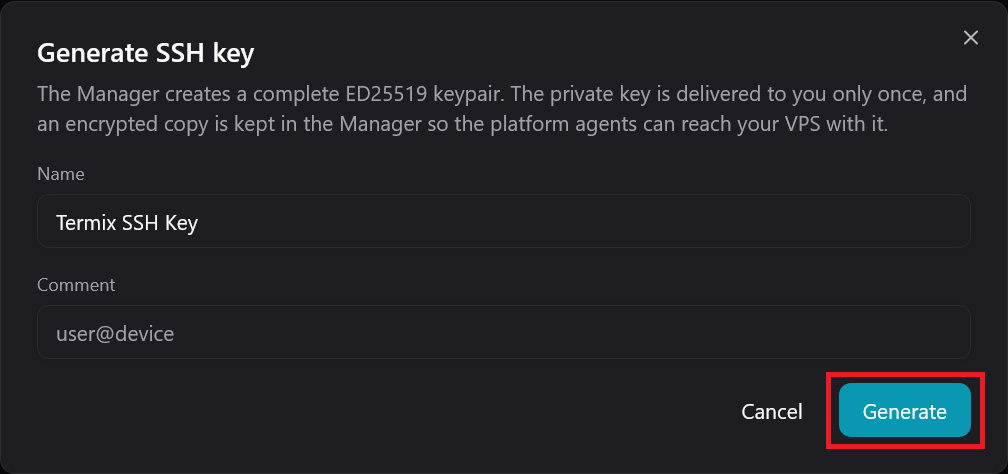
If you generate a new key, copy the private key now. It is only shown once.
Create the VPS
Open the VPSs tab and click Create your first VPS, or Create a VPS in the top right if you already have one.

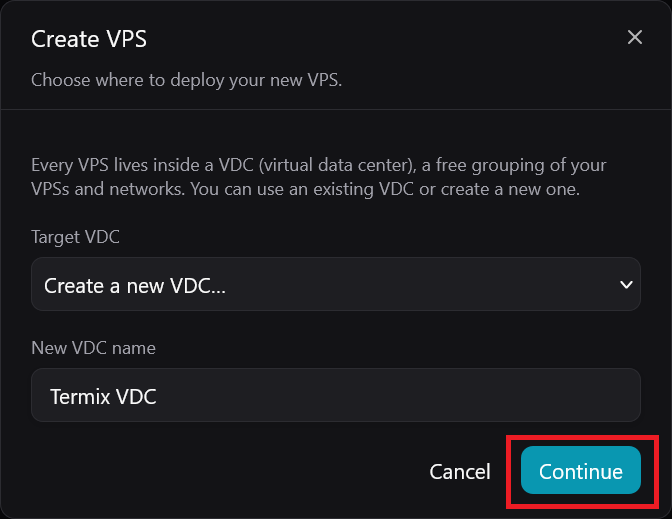
A modal opens. If this is your first GINERNET VPS, leave it on Create a new VDC and name it something like Termix VDC, then click Continue.
On the Basic configuration screen:
- Location: Whatever is avaliable to you
- Server type: AMD EPYC/Ryzen
- Hostname:
termix - Operating system: Debian 13 (Ubuntu works too)
- Management type: Unmanaged
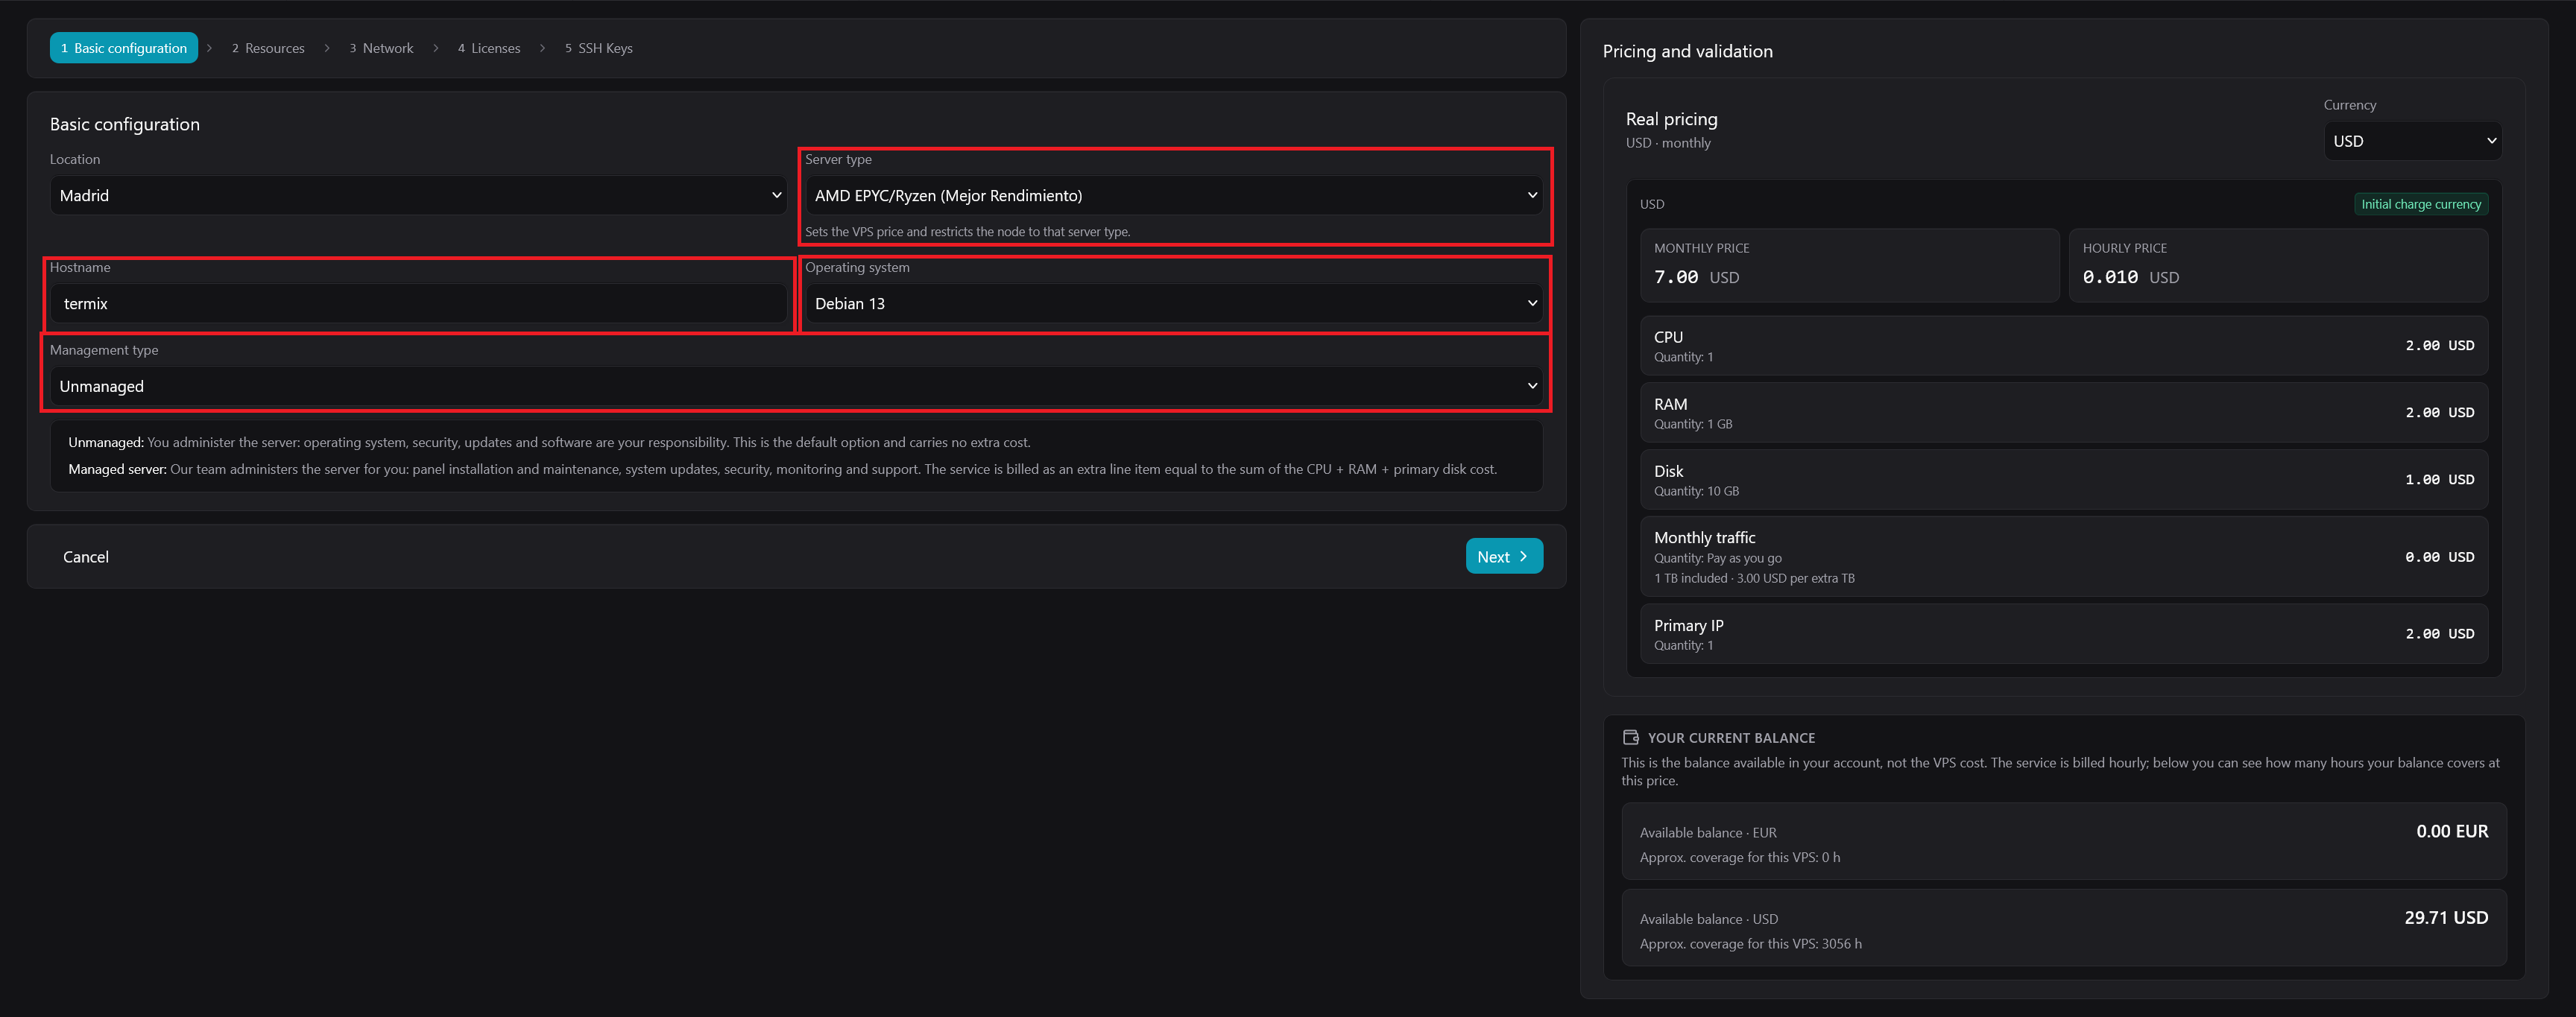
Click Next.
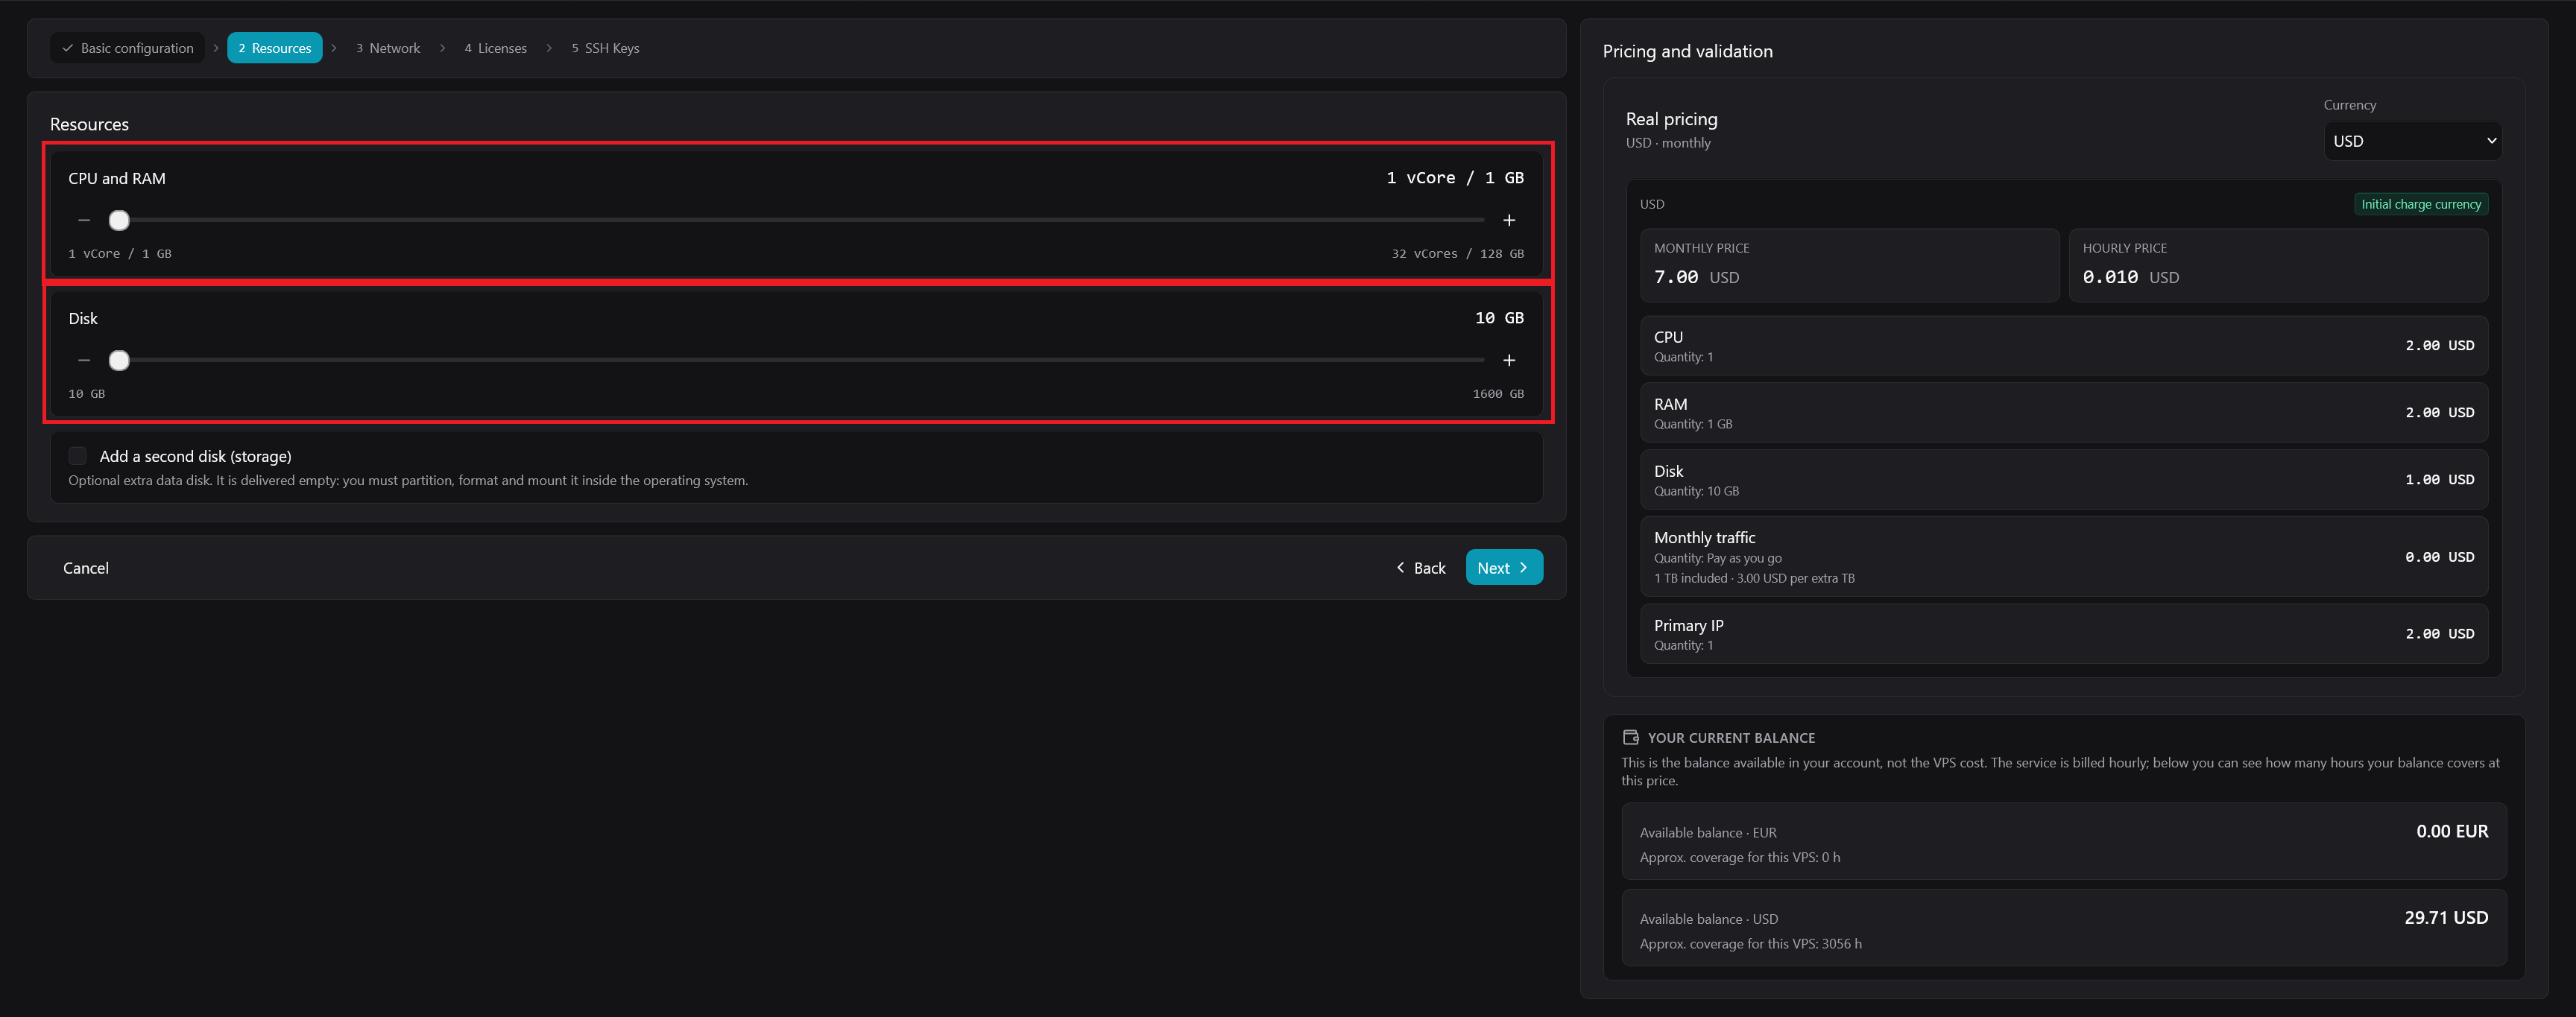
For Resources, 1 vCore and 1 GB of RAM is enough for 0 to 20 hosts. Scale up as you add more. The default 10 GB disk is plenty. Click Next.
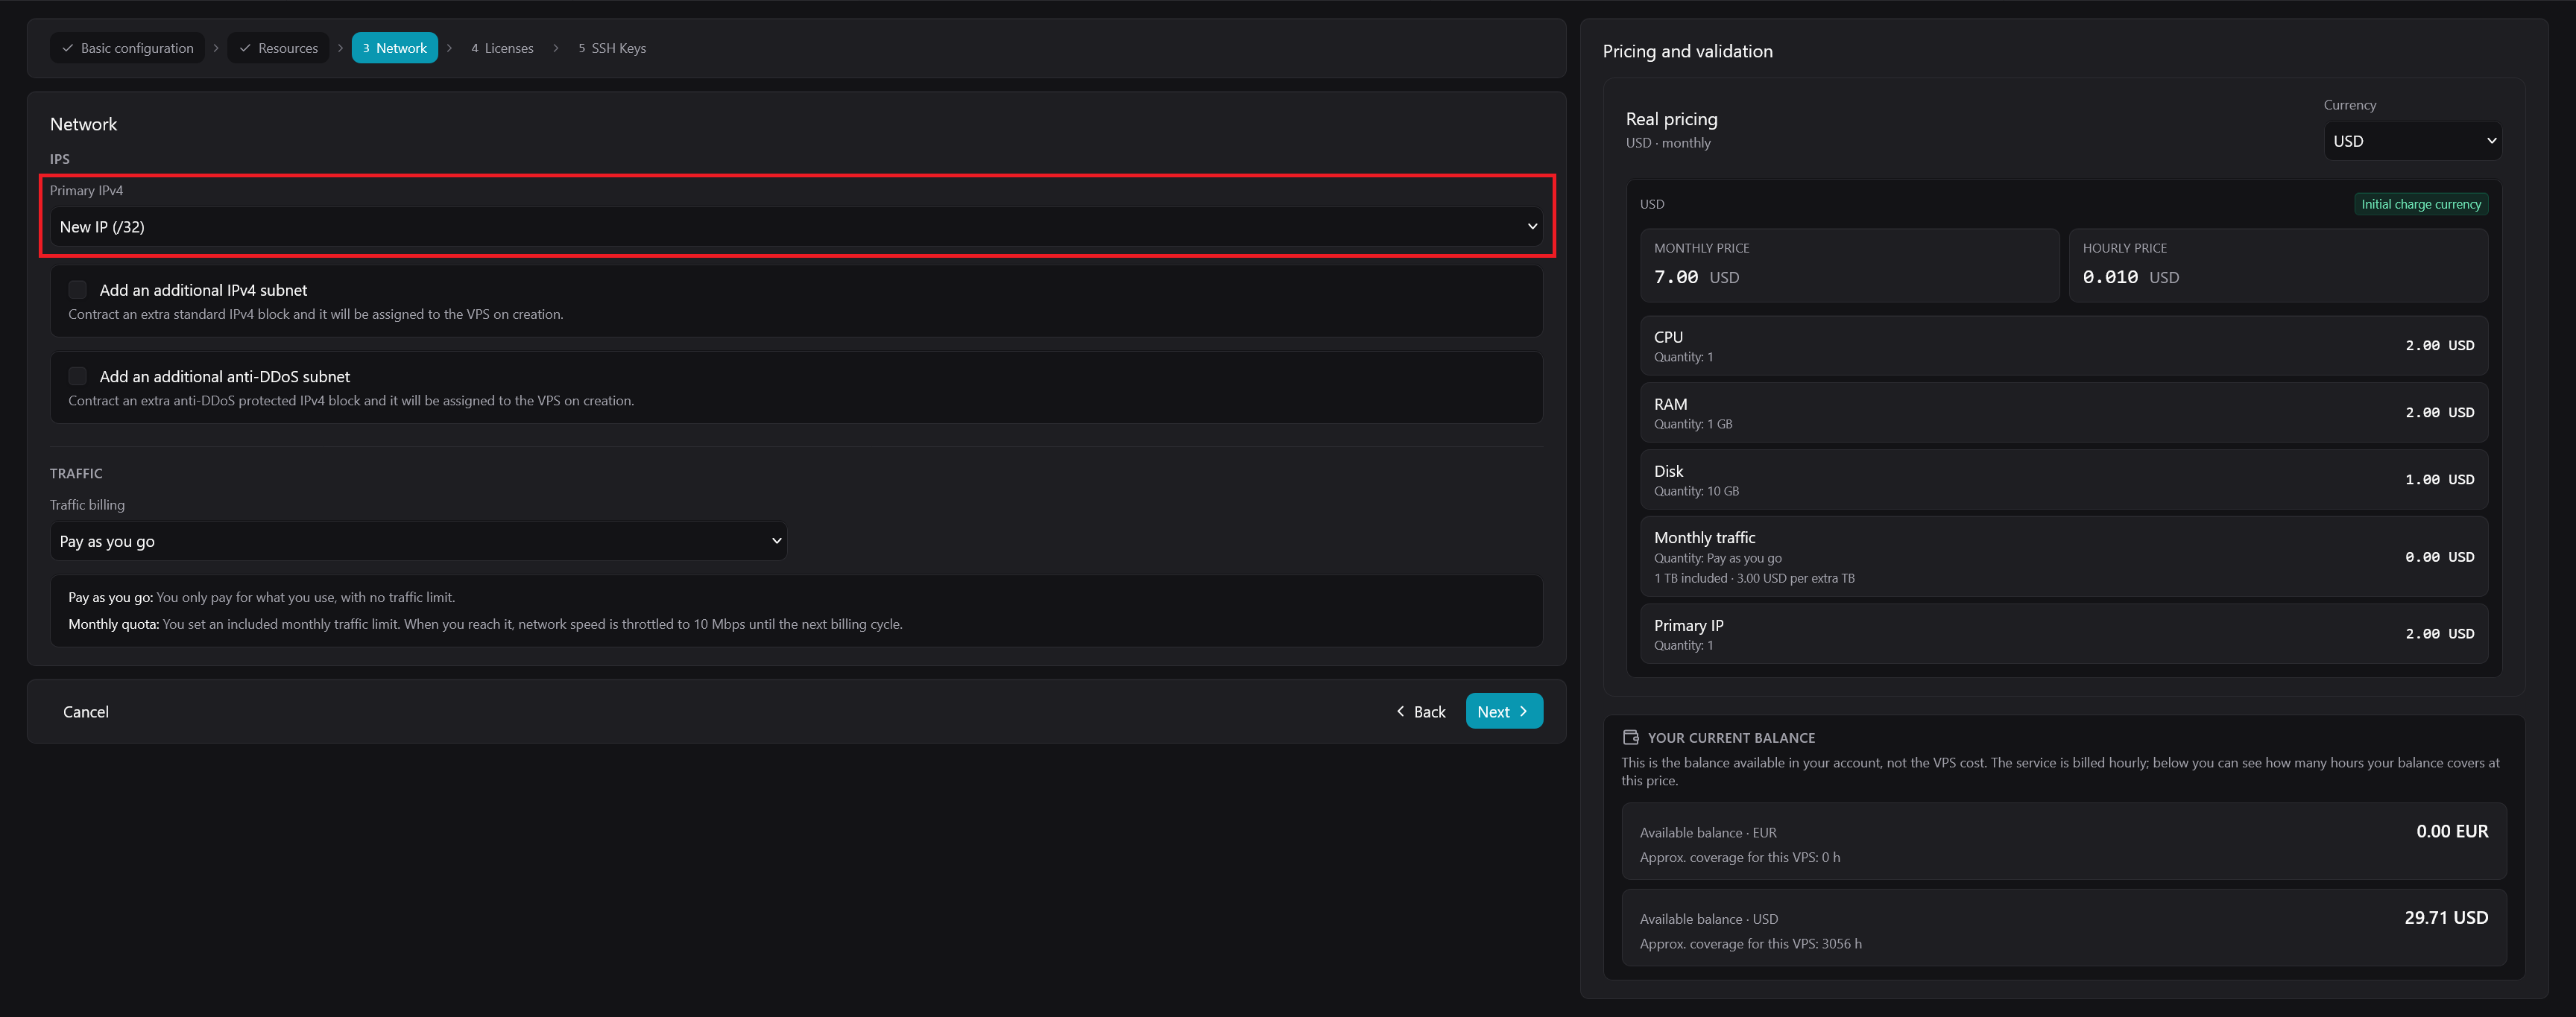
For Network, set Primary IPv4 to New IP (/32). Leave traffic billing on pay as you go unless you want a monthly quota. Click Next.
Skip the Licenses tab. On the SSH Keys tab, tick the key you just added.
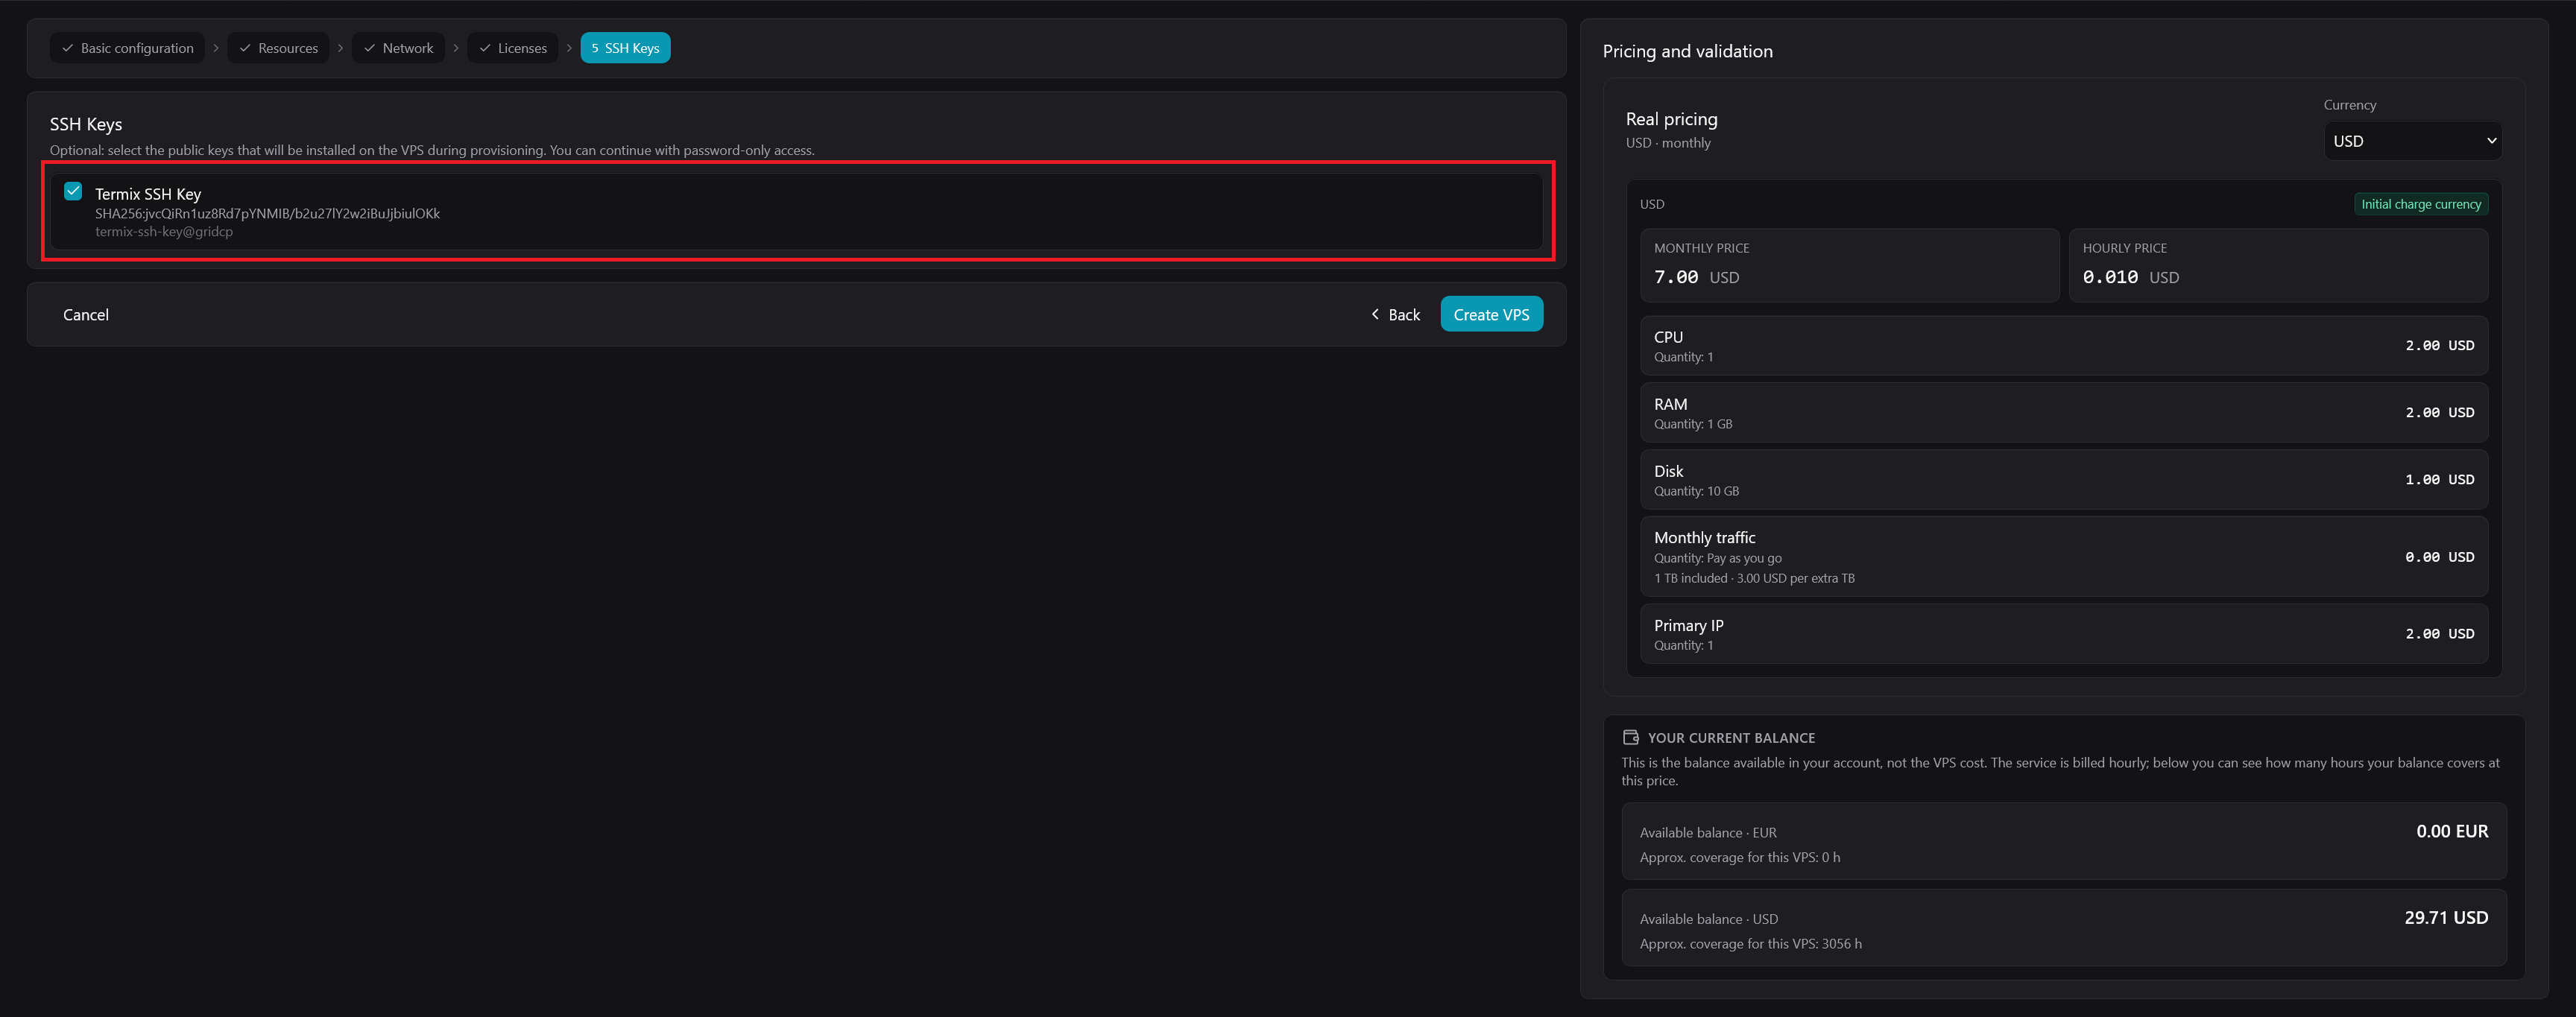
Click Create VPS. It takes about 30 seconds to provision. You can watch progress in the top right and on the progress bar at the bottom.
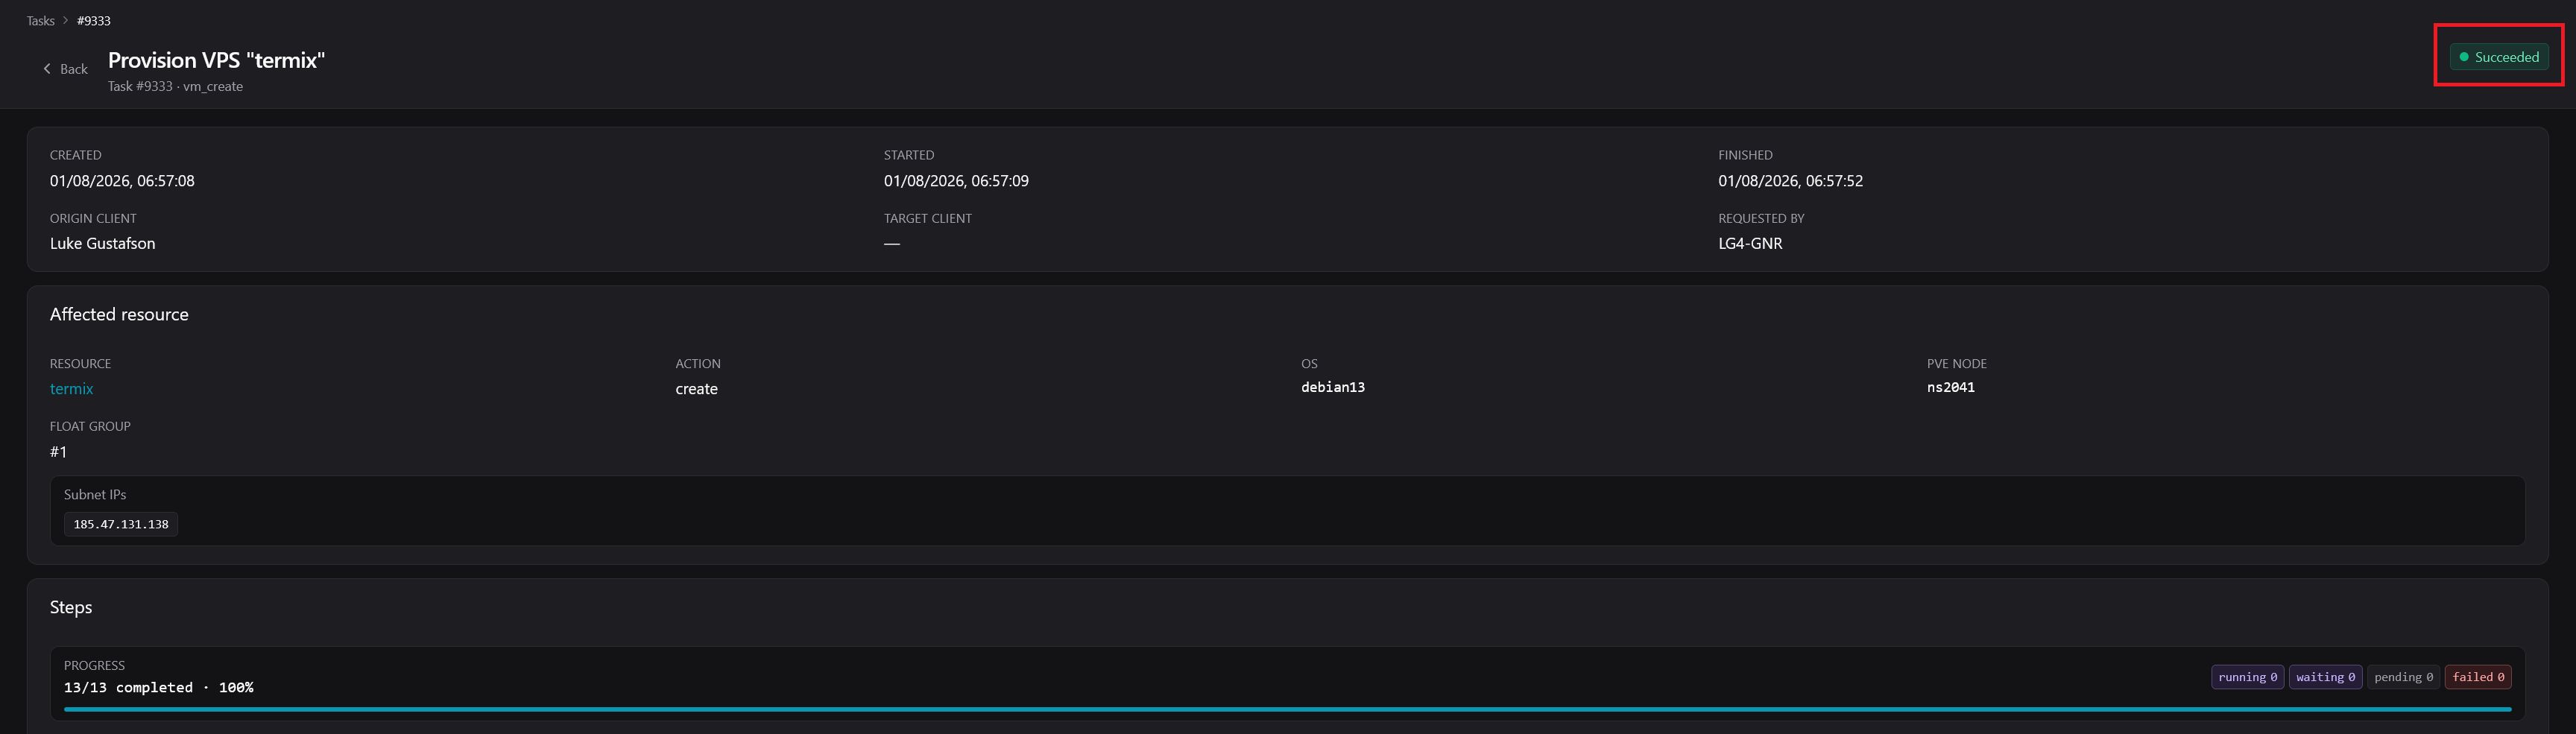
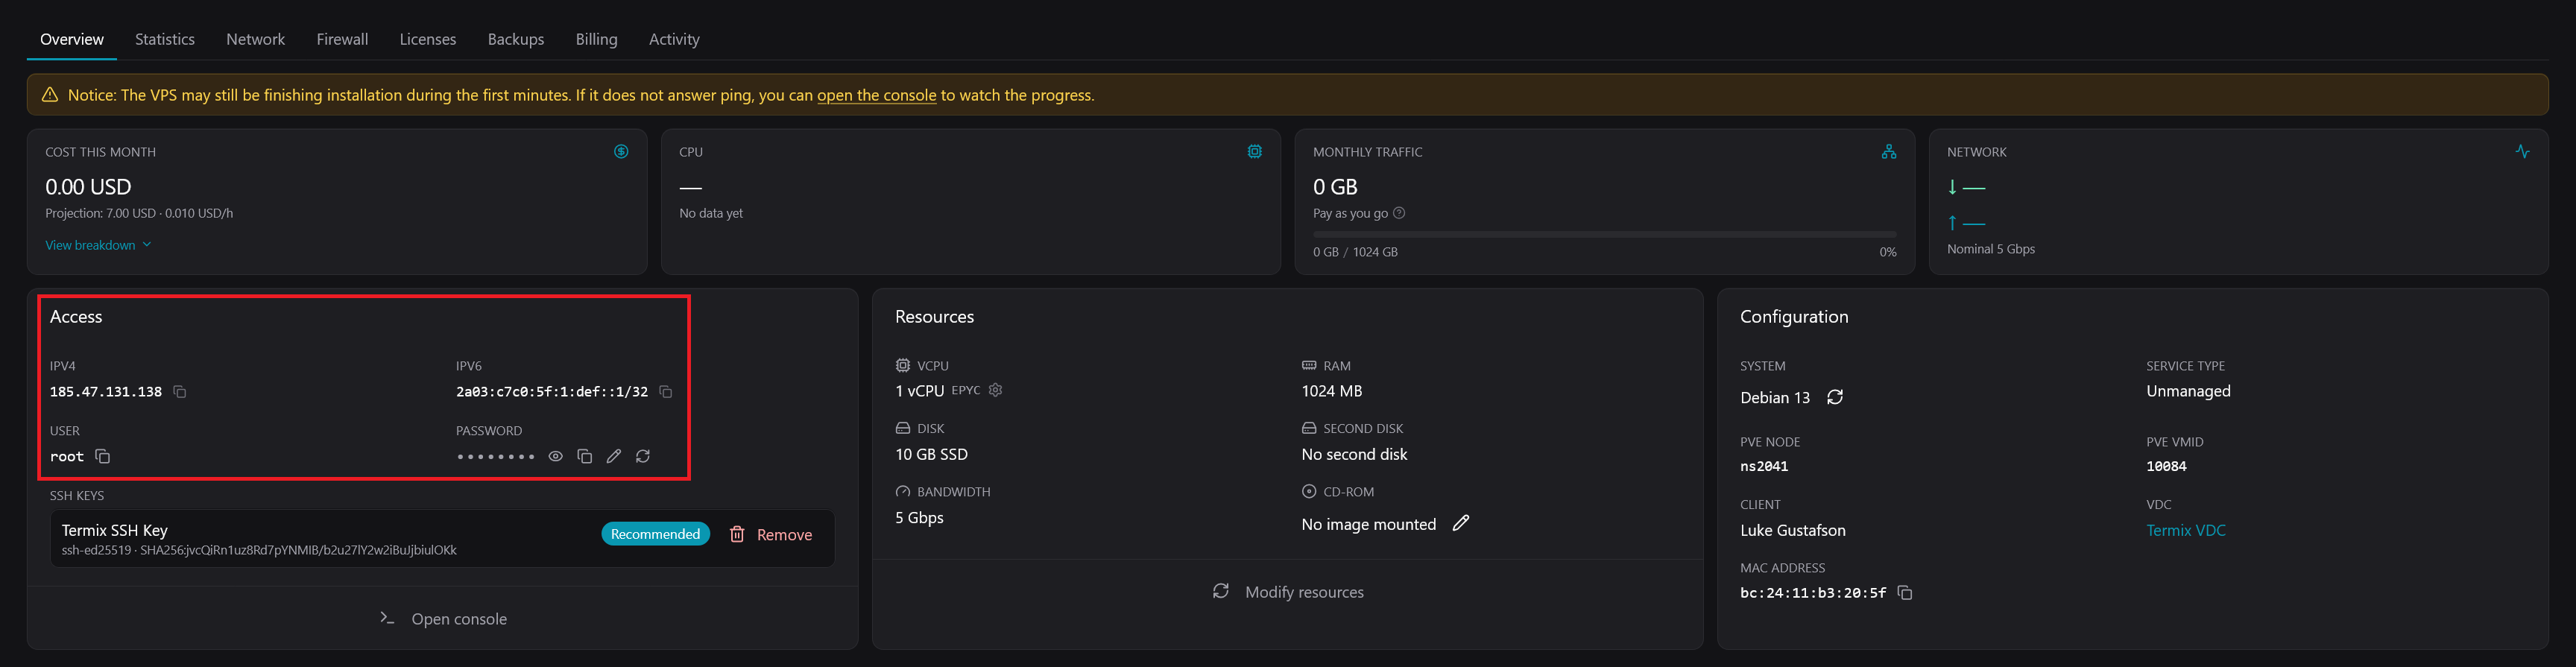
Once it shows as succeeded, open the VPSs tab and select your server. From here you can manage it, see your costs, network information, and public IP. Backups, stats, and the remote console are also here.
Open the firewall
Termix runs on port 8080, so you need to allow it.
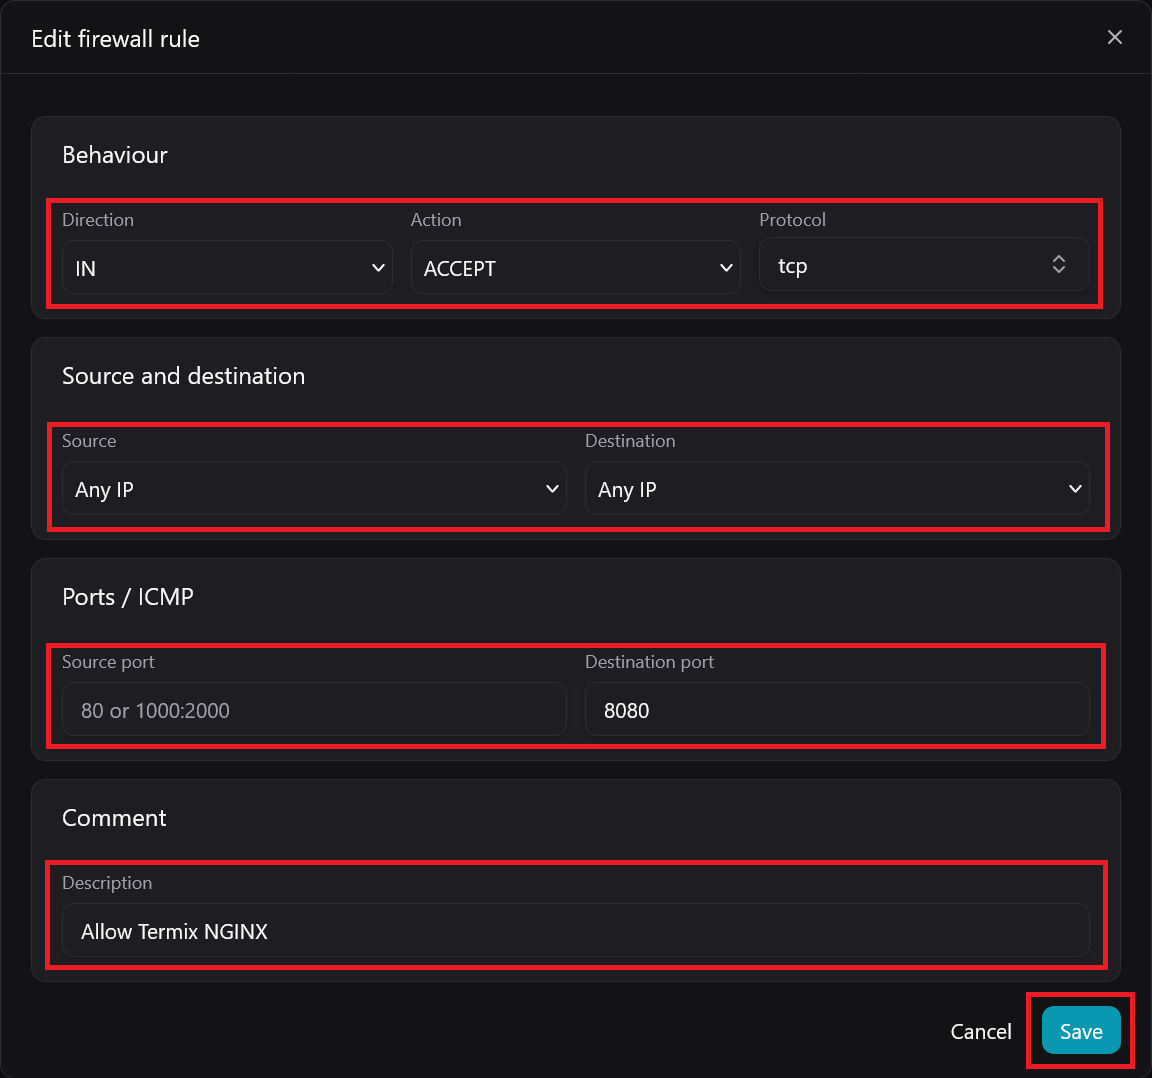
Open the Firewall tab at the top and click New rule in the rules box at the bottom.

Fill in the rule:
- Direction: IN
- Action: ACCEPT
- Protocol: tcp
- Source: Any IP, or just your own IP if you want to lock it down
- Destination: Any IP
- Source port: leave empty
- Destination port: 8080
- Description:
Allow Termix NGINX
Then hit Save.
Connect to the server
Go back to the overview page. The Access box on the left has your public IPv4 and IPv6 and the username.
Copy the IPv4 address and username into your SSH client and connect using the key you generated. If you do not have an SSH client set up, click Open console and work from the built in console instead. In the console, press enter, then log in with the username and password shown in the Access box.
Create a user (optional)
Logging in as root is not ideal. To create your own user:
adduser termix
Enter a password and fill in the prompts. Then open the SSH config:
nano /etc/ssh/sshd_config
Set these two values:
PermitRootLogin no
PasswordAuthentication no
Save and exit. Before restarting SSH, open a second connection with the new user and confirm it works. If you lock yourself out, you can still get back in through the GINERNET console.
Once you have confirmed it works, restart SSH:
sudo systemctl restart ssh
On Debian the service is ssh. On some distributions it is sshd. If the command above fails, try sudo systemctl restart sshd.
Install Docker
The current instructions are always in the Docker docs. As of now:
# Add Docker's official GPG key:
sudo apt update
sudo apt install ca-certificates curl
sudo install -m 0755 -d /etc/apt/keyrings
sudo curl -fsSL https://download.docker.com/linux/debian/gpg -o /etc/apt/keyrings/docker.asc
sudo chmod a+r /etc/apt/keyrings/docker.asc

# Add the repository to Apt sources:
sudo tee /etc/apt/sources.list.d/docker.sources <<EOF
Types: deb
URIs: https://download.docker.com/linux/debian
Suites: $(. /etc/os-release && echo "$VERSION_CODENAME")
Components: stable
Architectures: $(dpkg --print-architecture)
Signed-By: /etc/apt/keyrings/docker.asc
EOF

sudo apt update
Then install Docker:
sudo apt install docker-ce docker-ce-cli containerd.io docker-buildx-plugin docker-compose-plugin
Install Termix
Create a folder and download the compose file:
mkdir -p ~/termix
cd ~/termix
curl -fsSL -o docker-compose.yml https://raw.githubusercontent.com/Termix-SSH/Termix/refs/heads/main/docker/docker-compose.yml
Start it:
sudo docker compose up -d
The first start takes a while as the images download. It is ready when you see Container Termix started.
Open Termix
Termix is now running on port 8080. Open http://YOUR_IP:8080 in a browser, using the IPv4 address from the Access box.
Enter a username and password. This creates your first admin user, and Termix is ready to use.

Scaling up
If your instance starts feeling laggy as you add hosts, go to the VPS overview page and click Modify resources in the resources box to add more CPU or RAM.